Chocolate Tetris Piece Mold Tutorial
Previously, I posted about a complicated two-piece mold made using food-safe silicone. Now we’re going to go in a completely opposite direction: a super-simple one-piece mold using food-safe plastic that’s vacuum molded to shape, to produce these beauties:
These instructions will also work for any other pixellated shape. Please note that this is for pixellated *shapes*; if you want to make something that is recognizable due to pixel *color*, that’s a lot harder and using this technique involves having very steady hands and painting the mold. I recommend sticking to easily recognized shapes.
Now, vacuum molding has some interesting properties relative to silicone. It’s super-cheap per mold (materials cost: <2.50, even including shipping) but has a noticable start-up cost in money or labor to get the basic equipment; whereas the silicone is $20-$120 per mold even without shipping but doesn’t require that you get anything more than a cheap paintbrush or two.
What you’ll need:
- A vacuum molding table; you don’t need anything super-fancy, and you can frankly build one yourself pretty easily, but I’ll admit that I decided it not worth my time since I don’t have wood-working equipment and went ahead and bought a Kingston Mono for a bit over $125. Note that these “tables” are actually just a box that is airtight except for a bunch of holes on top and a connector to which a vacuum can be connected.
- A vacuum-forming frame, sized for your table and plastic; plus clips to hold the plastic inside. Mine is just two simple aluminum rectangles with ordinary large binder clips; it came with the table. Also a set of risers (aka pieces of wood ;)) that the frame can sit on in the oven to give the plastic room to sag.
- A vacuum cleaner. The ordinary home kind works just fine, although I found that cleaning the filter out helped noticeably. (The table manufacturer recommended removing the bag, but since I have a bagless, that wasn’t much use.)
- An oven. Probably. Honestly, over the course of this project I have been noticeably less convinced of the necessity of the oven, but I haven’t *actually* tested oven-free molding yet (that’ll be later this week) so I can’t guarantee I’m right about that.
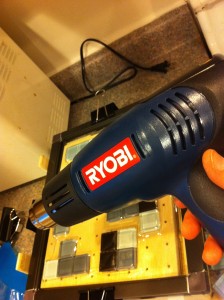
- A heat gun. I used a 4-setting $60 thing from Home Depot, and have been very happy, but my $20 embossing gun would probably have worked just as well.
- Food-safe plastic designed for vacuum forming. I used the Vivak PETG Food-Safe .30″ plastic, which is about $2/sheet for the large size I’m using.
- A set of square glass tiles from Home Depot, which ran me about $10. This is not the smallest size they had, but one up from that; but really, this will work no matter what size you get. I got glass rather than ceramic so that the sides would be smooth, which was probably doubly wise; removing the tiles from the mold was hard enough as it was!
- Packing tape or laminating paper or some similar easy-to-cut sticky sheet.
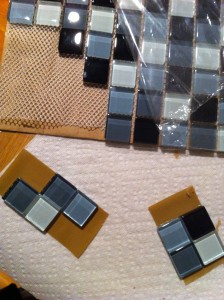
First, make yourself a set of Tetris pieces by carefully placing the tiles onto the sticky side of the tape, touching each other. They’ll be floppy when you pick them up, but that’s fine; you just want to make sure they’ve got a nice tight fit when they’re on a flat surface.
Next, you’ll want to lay them out on your vacuum forming table. Because I’ve got a nice big one, all the pieces fit in one batch; if you have a smaller one, you’ll want to do this in multiple batches. Be sure to leave a fairly good distance between the pieces; the plastic will sag down between them, but it will be faster, neater, and less likely to produce ugly folds if there’s more distance.
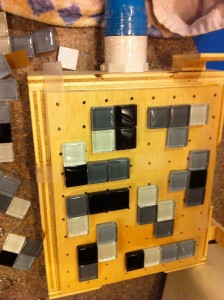 Next, make sure you’re ready to do your vacuum forming. This involves several steps, although all of them are actually pretty easy:
- Preheat your oven to the appropriate temperature for softening your plastic. For mine, this was just over 300 F.
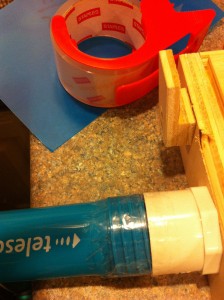
- Attach your vacuum cleaner’s hose to the table. I used packing tape. 😉
- Place a sheet of vacuum forming plastic between the two halves of the frame and use clips to hold the frame together.
- Place the risers in the oven, placed so you can easily put the frame on them when the time comes.
The first stage of the vacuum forming is very simple. Put the frame in the oven and let it heat until the plastic starts to sag an inch or so below the frame. (No picture of this because this is a fast step! It takes 60-90 seconds for the plastic to sag noticably, but once it does, it’s fast and you’ll want to be ready to move.) Pull it out and immediately place it over your table, aligning it *before* letting the plastic hit your masters, or it will drag them out of alignment and wrinkle. I speak from experience, here. Note that this is easier said than done; remember that the plastic is sagging? Yeah. If you get it a little bit off and drag things, you can put the plastic back in the oven to warm up slightly and fix the alignment, but it’s a pain, and wrinkles just don’t come out.
As soon as the plastic is draped over the table and masters, turn on the vacuum and let it run quickly. Once the plastic has stopped visibly moving, turn it off so it doesn’t overheat. You’ll probably have a shape that kinda-sorta matches your masters, but has a lot of excess air and loose draping:
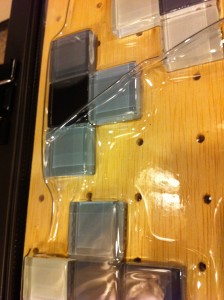 You can hopefully see here that there’s a gentle curve from the top of the shapes to the table, without clinging to the sides; and there are even some small wrinkles on top of the shape. (The big wrinkle? That’s from placing it badly. They’re ugly and leave a wrinkle on your final product, sadly; but thankfully, not a huge one. Worse on glass-looking designs like this than on some; this is why to be very careful about placing the plastic initially.) We clearly couldn’t cast nice-looking chocolates in this. Therefore, it’s time to bring in the big guns:
What we’ll be doing here is aiming the heat gun at smallish sections of the plastic (a few square inches, or one two-inch stretch that’s problematic; the larger it is, the longer it will take and the less reliable I’ve found it, but too small and you get annoyed) at a time, then vacuum forming them tightly. If you have a variable-heat gun, I found 580F to be a good temperature; I’d expect anything in the 600 range to work nicely. Hold the gun a few inches back from the plastic and aim it until you start to see the plastic shimmer and then droop. The drooping is important: I found that slightly slumping but not actively drooping plastic molded much less tightly. Then turn on your vacuum for a quick burst. It doesn’t take more than a second or two; you will see a *very* visible and obvious shrinking. Again, stop when the plastic stops moving so your vacuum doesn’t overheat. Repeat on the next section, and so forth. You may find yourself coming back to the first sections you do later, when you’ve fixed more and you see imperfections; taking multiple passes seems to be perfectly routine, but it goes faster than you might think even being perfectionist.
When you finish, your mold should be much, much tighter to the master, like so:
See how much sharper those angles are? If it weren’t for the shimmer, you might not even know the plastic was there.
Now, let the plastic cool thoroughly. It’s actually pretty quick. Remove the masters, and you have a mold! I found that this was much easier said than done, though. For one thing, this really is vacuum-molded, and tight; those masters won’t be easy to remove unless they’re actually sloped. For another, the glass tiles sometimes had heat-stress issues, presumably from the heat gun, and would crack slightly when being removed, with part of the glass actually *sticking* to the inside of the mold and needing to be very carefully removed. I found the best solution to both of these problems, odd though it is, is to remove the tiles while running the mold under water. Flex the mold slightly, push out, let the water get into the crack, then work them out, repeat. I often removed the masters in pieces; you can always reassemble them easily if need be.
And there you have it! A mold suitable for making chocolate Tetris pieces.

